Turn a simple Lantern lamp into a fantastic paper craft lamp with a couple of simple steps. Though not a lamp to brighten your room extremely it looks fantastic and gives off a soft light.
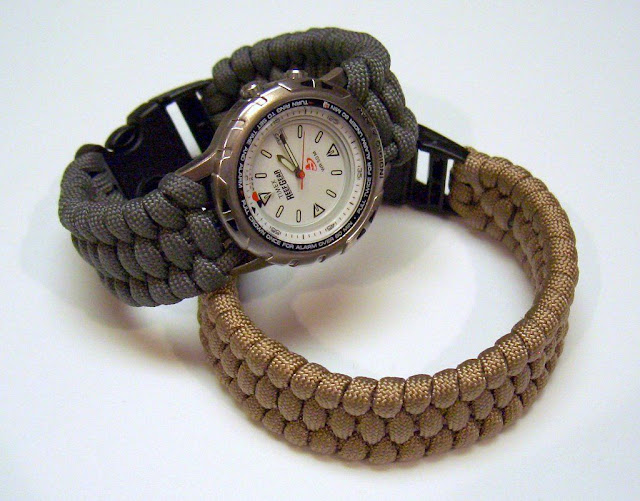
This tutorial will show how to make a Paracord bracelet or watch band using a weaving method. Step 1: Supplies For this project, you'll need approximately 10 feet of paracord, scissors, lighter, tape measure, hemostats, watch, and a 5/8" side release buckle . Paracord can be found at local Army/Navy stores or from various online sources: A mazon , S hopclues , ebay, etc... The actual amount of paracord that will be used depends on your wrist size, cord, and tying technique(tight/loose). A typical wrist is about 8.5 inches and I actually used around 8 or 9 feet after finishing the bracelet/watchband. So using 10 feet is usually a safe estimate for most folks, since having too much cord is better than coming up short when making your project. *If making a watchband, the watch needs to have about 5/8" space between the lugs(where the watch pins go) so that 5 strands of paracord will fit.
How to make a high quality stamp out of your favorite logo or symbol. You will need the following materials: Speedball 6-Inch by 12-Inch Speedy-Carve Block Speedball Linoleum Cutter Assortment 1 which contains a straight bits & gouging bits 5 Minute Two-Part Epoxy Scrap wood for handle Polyurethane spray and finally an ink pad! Step 1: Select a favorite symbol or logo to use as a stamp Start by selecting a few black and white logos, symbols or other emblems that you would be interested in having a stamp of. It could even be some text. Just try to avoid an image with very thin lines as these can be difficult to carve, and can bend/collapse under the pressure of stamping down. Using an image editing program or even MS Word, create a black background and arrange them to appear side by side. Having the black background helps a lot when transferring images to rubber sheet. *Note* There is no need to mirror/reverse anything as they wil...
Ever had a used tea-light with no or minimal wax and wick. Ever wondered what you could make of those used tea-light molds? Well, recycling is not a necessity in a way it's an art. You can customize anything when you recycle. I'm going to show you how to recycle those old, used tea-lights to make beautiful oil lamps. Oil lamps are easy to make and can come of good use in the long run. So lets begin making some tea-light oil lamps. Step 1: Things You Require Used tea-lights Cotton Fiber Tweezers Castor oil And that's about it,lets make. Step 2: Clearing the Mold Using a tweezers, remove the unwanted wax and wick from the tea-light. With a clean cloth wipe the mold to remove any trace of wax. Step 3: Making the Wick Spread the cotton fiber to form a thin sheet. Then roll it up between your palms. Roll and stretch until you have a wick a wick of sufficient t...


Comments
Post a Comment